01. Overview & The Two Resources
Sapphire Bay is your personal tropical island — a 60×60 grid you start with covered in fog and coconut trees. You clear it, build it up with decorations, and the placed decorations grant permanent attribute buffs that apply to your entire account (not just on the island). Above that, your decoration choices determine your Prosperity score — the metric that drives the leaderboards.
Two Distinct Resources
 Coconut Cocktails
The island's currency. Spent on Tiki Bar / Workshop upgrades and the Sapphire Bay Store.
Earned from: Tiki Bar production, Coconut Processing Plant, clearing trees (720 wood = 1 cocktail), Supply Crates, tasks, sign-in rewards, and helping allies manage their bars.
⭐ Prosperity
The island's score. Drives the four leaderboards (Alliance / State / Neighboring / Global).
Earned from: Placing and upgrading decorations on the island. Each decoration has its own Prosperity value at each level.
🔄 The Core Loop
- Workshops chop coconut trees → wood → cocktails (720:1 ratio)
- Tiki Bar produces cocktails passively (120-300/hr depending on level)
- Use cocktails to upgrade Tiki Bar and Workshops
- Tiki Bar upgrades unlock attribute buffs AND raise cocktail output
- Spend cocktails in the Sapphire Bay Store to acquire decorations
- Place decorations → gain Prosperity + buffs
- After all trees cleared → Processing Plant unlocks (40 cocktails/hr/worker, steady-state)
02. Unlocking: The Prologue Voyage
Before you can enter Sapphire Bay, PD Gate — Members Only and you must complete a 3-day voyage (real-time hours) that gates access to the island. Each day delivers 8 narrative log entries at 3-hour intervals (0, 3, 6, 9, 12, 15, 18, 21h) plus a station event at the 24h mark. You can claim rewards as the entries unlock — there's no penalty for waiting, but the prologue won't accelerate either.
Voyage Itinerary
| Day | Conditions | Destination | Station Reward |
|---|---|---|---|
| Day 1 | Clear Skies | White Wave Island | 5× resource items, 2× speedup, 2× component |
| Day 2 | Gloomy Skies | Echo Island | 5× resource items, 3× speedup, 3× component |
| Day 3 | A Storm Strikes | Sapphire Bay (arrival) | No item — story beat unlocks the island |
📖 The Story (Brief)
Smugglers seized the nearby islands as speedboat and supply hubs. Your patrol boat clears White Wave Island, then Echo Island, then pushes through a violent storm to reach Sapphire Bay just after the storm wrecks the smugglers' hideout. You inherit the island.
💡 Practical Note
The 3-day prologue is a real-time wait. Claim entries as they unlock to keep the rewards flowing, but there's no fast-forward. Use this time to plan: review your account's bottlenecks (combat vs economy) so you know which buffs to prioritize once the island opens.
03. The Island Map & Tree Clearing
Sapphire Bay is a 60×60 grid. At the start, only 9 columns of the western beach strip (x = 0-8) are open and cleared. The rest of the island is covered in fog and dense coconut tree growth. Clearing the island is a long-term project — and unlocking the Processing Plant requires clearing it ENTIRELY.
How Fog Works
Fog clears automatically as adjacent grids become open. There's no direct action to “lift” fog — clear the coconut trees and supply crates around it, and fog dissolves on its own. Tapping a still-fogged tile just shows the message “This area is still covered in fog.”
Once the entire island is finished (all trees cleared), fog stops rendering at all.
How Tree Clearing Works
- ▸ Trees are not tapped manually — your Coconut Workshop worker NPCs do all the chopping automatically.
- ▸ Each tree has approximately 37,440 HP. Workers chip away at the workshop's chop rate per second (6-15 dmg/sec depending on Workshop level).
- ▸ Cleared trees yield wood, which converts to cocktails at 720 wood = 1 Coconut Cocktail.
- ▸ The wood-to-cocktail collection bubble only appears when you have at least 720 wood stored. Collection count = floor(stored wood / 720).
- ★ More workshops = more workers = faster clearing. Place additional workshops to accelerate the clear, and upgrade them for higher chop rates and storage.
- 📖 Deep dive on how workers select trees, exact cocktail math, and the online/offline efficiency mechanic: See Core Buildings → How Workers Actually Chop Trees.
🎉 Full-Clear Reward
Once you clear every tree on the island, the “Island has been cleared!” event fires:
- ▸ One-time finish reward (likely a high-tier decoration token - currently unnamed in the code)
- ▸ Coconut Processing Plant unlocks for placement
- ▸ Coconut Workshops can finally be reclaimed/removed (they're locked until full clear)
04. Core Buildings
Three core buildings drive the island's economy: the Tiki Bar (passive cocktail generation + buff hub), the Coconut Workshop (tree clearing → wood → cocktails), and the Coconut Processing Plant (post-clearing steady-state production).
🏠 Tiki Bar (Central Hub)
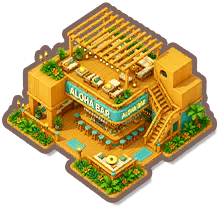
The Tiki Bar is the centerpiece of your island. Each level grants a cumulative attribute buff stack, increases passive cocktail production, and unlocks ranking eligibility. Storage caps at 12 hours of yield — claim before it fills or overflow is lost. This is the “Police Department” of your island — it gates all other buildings and progress as well as unlocks additional buffs as it is upgraded.
| Lvl | Cocktails/hr | Prosperity Required | Upgrade Cost | Cumulative Buffs (at this level) |
|---|---|---|---|---|
| Lvl 1 | 120 | — | — | Healing Speed +30% |
| Lvl 2 | 150 | 150 | 500 cocktails | Healing Speed +30%, Deployment Capacity +10% |
| Lvl 3 | 180 | 600 | 1,000 cocktails | Healing Speed +60%, Deployment Capacity +10% — UNLOCKS RANKINGS & ALLY HELP |
| Lvl 4 | 210 | 1,200 | 5,000 cocktails | Healing Speed +60%, Deployment Capacity +10%, Squad Defense +5% |
| Lvl 5 | 240 | 2,400 | 10,000 cocktails | Healing Speed +90%, Deployment Capacity +10%, Squad Defense +5% |
| Lvl 6 | 270 | 4,000 | 20,000 cocktails | Healing Speed +90%, Dep. Cap +10%, Squad Def +5%, Squad Atk +5% |
| Lvl 7 (max) | 300 | 7,000 | 30,000 cocktails | Healing Speed +120%, Dep. Cap +10%, Squad Def +5%, Squad Atk +5% |
Tiki Bar Lvl 3 is THE critical milestone. It unlocks BOTH the Prosperity rankings (you can't be ranked below Lvl 3) AND the ability to receive help from allies. Total cost to reach Lvl 3: 6,500 cocktails + 1,200 Prosperity from decorations. This should be your first major goal.
🪓 Coconut Workshop (Logging)
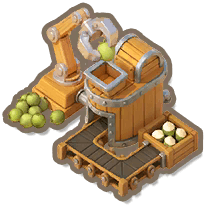
Workshops spawn worker NPCs who automatically chop coconut trees and carry wood back to storage. Workshop count = parallel clearing speed. Workshop levels = chop rate, carry capacity, and storage caps. You can have multiple workshops on the island.
| Lvl | Workers | Chop/sec | Carry/trip | Wood Storage | Upgrade Cost |
|---|---|---|---|---|---|
| Lvl 1 | 1 | 6 | 360 | 64,800 | — |
| Lvl 2 | 1 | 7 | 840 | 108,000 | 100 cocktails |
| Lvl 3 | 1 | 8 | 1,440 | 144,000 | 400 cocktails |
| Lvl 4 | 2 | 9 | 2,160 | 388,800 | 600 cocktails |
| Lvl 5 | 2 | 10 | 3,000 | 504,000 | 1,000 cocktails |
| Lvl 6 | 2 | 11 | 3,960 | 633,600 | 1,600 cocktails |
| Lvl 7 | 2 | 12 | 5,040 | 777,600 | 2,100 cocktails |
| Lvl 8 | 2 | 13 | 6,240 | 936,000 | 3,000 cocktails |
| Lvl 9 | 2 | 14 | 7,560 | 1,108,800 | 4,000 cocktails |
| Lvl 10 (max) | 2 | 15 | 9,000 | 1,296,000 | 5,000 cocktails |
💡 Workshop Lvl 4 Breakpoint
Lvl 4 is where each Workshop gains a second worker — effectively doubling its clearing throughput. If you only upgrade one Workshop, get it to Lvl 4 before building a second. If you can afford multiple Workshops, level each one to Lvl 4 ASAP before pushing any single one higher.
🌳 How Workers Actually Chop Trees
Understanding how the Workshop's workers select and chop trees reveals two critical strategic levers: (1) you can indirectly steer the clearing direction by placing Workshops, and (2) keeping the game open on the Island screen DOUBLES your wood production.
The Frontier System (Which Trees Get Chopped)
Each worker runs a simple animation loop: IDLE → MOVING_TO_TREE → CHOPPING → RETURNING. But they can only chop trees on the “frontier” — uncleared trees that touch already-cleared land.
- ▸ The game scans the island and defines what's “cleared.” Any uncleared tree adjacent to cleared land becomes a frontier tree.
- ▸ Deep interior trees are off-limits until the edge in front of them is cleared — you can't tunnel to a specific far tree. Clearing expands outward ring by ring.
- ▸ When idle, a worker picks the nearest frontier tree to its Workshop that no sibling (a worker from the same workshop is at) worker is already chopping.
- ▸ Workers fan out to different nearby trees rather than stacking on one (they track which trees co-workers have claimed).
- ▸ Walk to tree → play cut-down animation → chop until tree dies OR cargo is full → walk home and deposit.
- ▸ If wood storage is full, workers just wait — no wood is ever lost.
Workshop Strategy — Members Only
Signup to unlock this content.
The Tree HP & Cocktail Math
Every coconut tree on the island has identical stats. Wood gained = HP removed, 1:1, with zero loss:
- ▸ Tree HP: 37,440 (every tree, no exceptions)
- ▸ Conversion: 720 wood = 1 Coconut Cocktail
- ▸ Yield per tree: exactly 52 cocktails (37,440 ÷ 720 = 52)
The devs deliberately tuned each tree to be worth exactly 52 cocktails. That means the entire forested island has a FIXED total cocktail-from-wood ceiling — what Workshop level controls is how FAST you extract it, not the total amount.
Time to Fell One Tree (Per Workshop Level)
Workshop efficiency (6-15 dmg/sec) and worker cargo capacity only affect throughput, not the per-tree total. A Lvl 1 Workshop and a Lvl 10 Workshop both extract exactly 52 cocktails from each tree — the Lvl 10 just does it 2.5× faster per worker.
| Workshop Lvl | Dmg/sec per Worker | Carry/Trip | Roundtrips per Tree | Time to Fell One Tree | Speedup vs Lvl 1 |
|---|---|---|---|---|---|
| Lvl 1 | 6 | 360 | ~104 | ~104 min (1h 44m) | baseline |
| Lvl 2 | 7 | 840 | ~45 | ~89 min (1h 29m) | 1.17× |
| Lvl 3 | 8 | 1,440 | 26 | ~78 min (1h 18m) | 1.33× |
| Lvl 4 | 9 | 2,160 | ~18 | ~69 min (1h 9m) | 1.50× + 2 workers |
| Lvl 5 | 10 | 3,000 | ~13 | ~62 min (1h 2m) | 1.67× |
| Lvl 6 | 11 | 3,960 | ~10 | ~57 min | 1.83× |
| Lvl 7 | 12 | 5,040 | ~8 | 52 min | 2.00× |
| Lvl 8 | 13 | 6,240 | 6 | 48 min | 2.17× |
| Lvl 9 | 14 | 7,560 | ~5 | ~45 min | 2.33× |
| Lvl 10 (max) | 15 | 9,000 | ~5 | ~42 min | 2.50× |
These numbers are pure active chop time — they don't include walking back and forth between the tree and Workshop (which happens whenever cargo fills up or the tree dies). Walking time and cargo trips add real overhead, especially at low Workshop levels where cargo is small (Lvl 1 carries only 360 wood per trip, so a worker needs ~104 trips to fully strip one tree).
🔥 The Biggest Hidden Mechanic: Online vs Offline Efficiency
Wood production runs at 100% efficiency only while you're on the Island screen. Anywhere else (including elsewhere in the game) = 50% efficiency. This is from the official YOTTA guide and confirmed by the source code.
Why: wood production is driven by a real-time scene simulation, not a passive server timer. The worker chopping animations only run while you're actively viewing the Island scene. The moment you leave that scene, the game disposes all worker animations — no chopping happens client-side. When you return, the game logs how long you were gone and credits you at HALF rate for that elapsed time.
Practical impact: If you can keep the game open on the Island screen during the day (lunch breaks, working from home, second device, etc.), you literally DOUBLE your tree-chopping rate. This is the single biggest accelerator for the entire Sapphire Bay system — and unlike most efficiency boosts, it costs nothing.
If you'd like to test this, close your game entirely and then return to the island screen and you will see your workers leaving the workshop to head to chop down some trees. Workers may still on occasion be working if you go to the PD/State screen and then come back as the island screen may be “backgrounded” for a short period of time, so the animation is still running. However, the island screen will close in the background after a certain amount of time and therefore you will fall back to the 50% collection rate.
🥥 Coconut Processing Plant (Endgame Production)
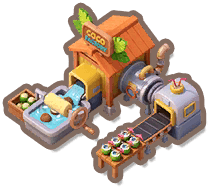
The Plant is your endgame steady-state cocktail tap. It's locked until the entire island is cleared — every coconut tree must be chopped down before you can place it. Once placed, it produces 40 cocktails/hr per worker with a 2,000 cocktail storage cap.
Single Level Only
No upgrade track. The Plant exists at one level: 40 cocktails/hr per worker, 2,000 storage cap.
Storage Discipline
With only 2,000 cap, the Plant fills in ~50 hours at one worker. Claim daily or you waste production.
05. Supply Crates
Scattered across the island are 60 Supply Crates with predetermined positions and rewards. A crate can only be opened when at least one of its 4 orthogonally-adjacent grids is cleared — clear the trees around it first.
Coordinate System — Members Only
Signup to unlock this content.
Crate Type Summary
| Type | Count | Contents | Total Cocktails |
|---|---|---|---|
| Standard (Type 1) | 50 | Cocktails only (1,500 / 3,000 / 5,000 ranges) | ~179,500 |
| Special (Type 2) | 10 | 500 cocktails + 1 component item (50% give Legendary Universal Hero Fragment×3, 50% give 8-hr universal speedup×1) | 5,000 |
| Total | 60 | + 5× 8-hr universal speedup + 5× Legendary Universal Hero Fragment×3 (15 total) | ~184,500 |
Worth understanding: 184,500 cocktails from supply crates is a substantial bankroll — more than the cost to fully upgrade the Tiki Bar to max (which requires ~66,500 cocktails in total upgrade costs). Plan tree clearing routes to prioritize unlocking crate-adjacent grids early.
Crate Locations — Members Only
Signup to unlock this content.
06. Decoration System
Decorations are the main lever for both Prosperity and account-wide attribute buffs. Understanding the system's mechanics — Max Active Number, upgrading, dismantling, and the recycle shop — is essential for not wasting cocktails on duplicates.
Functional vs Cosmetic
🎯 Functional
Provide Prosperity AND (Rare/Epic only) attribute buffs. Five rarities, 31 decoration types.
- ▸ Common/Uncommon: Prosperity only, no buffs, Max Active 2-5
- ▸ Rare: Prosperity + utility buffs (Max Active 1)
- ▸ Epic: Prosperity + combat buffs (Max Active 1)
🎨 Cosmetic
Paths, fences, plants, water features. Bought with diamonds or cash resource from the store.
- ▸ Zero Prosperity contribution
- ▸ Zero buff contribution
- ▸ Up to 500 of each can be placed
Cosmetics Warning — Members Only
Signup to unlock this content.
Max Active Number — The Cap That Matters
Each decoration has a Max Active Number that limits how many copies count toward Prosperity AND buffs at once. If you place more than the cap, only the highest-level copies contribute. Anything beyond becomes wasted placement.
| Decoration Group | Max Active | Implication |
|---|---|---|
| Common (per type) | 2-4 | Place multiples; cheap prosperity |
| Uncommon (per type) | 2-5 | Place multiples; medium prosperity |
| Rare (per type) | 1 | Only 1 active — upgrade it, don't duplicate |
| Epic (per type) | 1 | Only 1 active — upgrade it, don't duplicate |
| Tiki Bar | 1 | One Tiki Bar — that's the whole point |
| Cosmetic | 500 | Functionally unlimited but contribute nothing |
Upgrading Decorations
Decoration upgrades consume unplaced Lvl 1 copies of the same decoration from your Island Warehouse. Only Lvl 1 materials work — higher-level copies must be dismantled first to revert them to their constituent Lvl 1 mats.
Total Lvl 1 copies to max one decoration: 1 (initial) + 2 + 3 + 4 + 5 = 15 Lvl 1 copies to bring one decoration from placed-at-Lvl-1 to fully-maxed-at-Lvl-5.
Dismantling & Recycling
- ✓ All decorations except Tiki Bar and Coconut Workshop can be dismantled. Dismantling returns the Lvl 1 materials spent during upgrades — no loss.
- ✓ Advanced decorations dismantle into the corresponding number of Lvl 1 decorations at no loss. Useful when a purchase would exceed your Max Active cap.
- ↻ Recycle Shop: Surplus decorations can be recycled directly into Coconut Cocktails. The cocktail payout per decoration is stored on each item's data.
- ★Universal Decoration Construction Blueprints: These exchange into Sapphire Bay Lighthouse Blueprints — see the Scenic Decorations entry in the Decoration Catalog. Save them — don't recycle them.
07. Decoration Catalog
All 31 functional decorations, organized by rarity. Common and Uncommon give Prosperity only; Rare and Epic also grant attribute buffs. Each decoration shown at Lvl 1 and Lvl 5 (max).
Common (50 Prosperity each, Max Active 2-4)
| Name | Max Active | Prosperity (each) | |
|---|---|---|---|
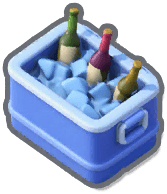 | Beer Cooler | 4 | 50 |
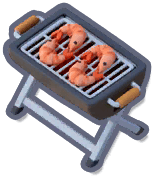 | BBQ Grill | 4 | 50 |
 | Beach Chair | 4 | 50 |
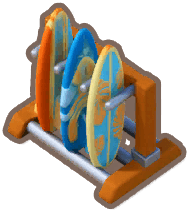 | Surfboard Rack | 2 | 50 |
 | Lifeguard Tower | 2 | 50 |
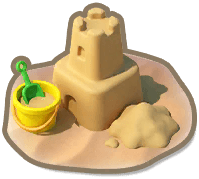 | Sandcastle Set | 2 | 50 |
Uncommon (100 Prosperity each, Max Active 2-5)
| Name | Max Active | Prosperity (each) | |
|---|---|---|---|
 | Coast Guard Flag | 5 | 100 |
 | Kayak | 4 | 100 |
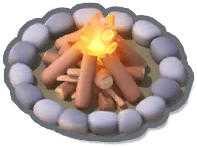 | Campfire | 4 | 100 |
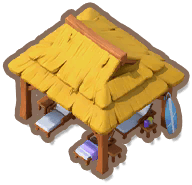 | Thatched Pavilion | 2 | 100 |
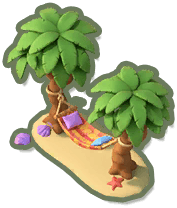 | Coconut Tree Hammock | 2 | 100 |
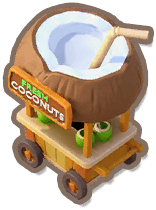 | Freshly Cut Coconut Stall | 2 | 100 |
Rare (Utility Buffs, Max Active 1)
Each Rare decoration starts at 200 Prosperity / Lvl 1 buff and maxes at 1000 Prosperity / Lvl 5 buff.
| Name | Lvl 1 Buff | Lvl 5 Buff (max) | |
|---|---|---|---|
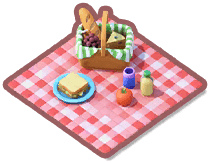 | Picnic Mat | Cash Confiscation +6% | +30% |
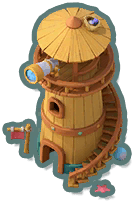 | Bird Watching Tower | Squad Deploy Speed +1% | +5% |
 | Ice Cream Truck | Dispatch Speed +2% | +10% |
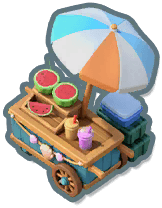 | Fruit Stall | Training Speed +1% | +5% |
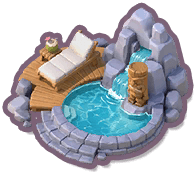 | Seaside Hot Spring | Research Speed +0.8% | +4% |
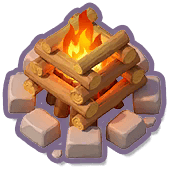 | Large Bonfire | Construction Speed +0.8% | +4% |
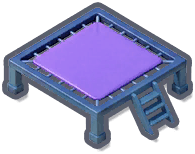 | Beach Trampoline | Electricity Confiscation +6% | +30% |
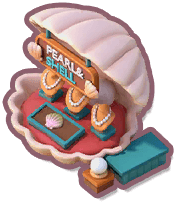 | Coastal Crafts | Healing Speed +2% | +10% |
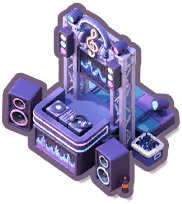 | Beach DJ | Gas Confiscation +6% | +30% |
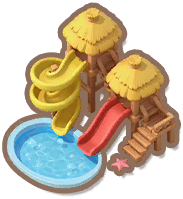 | Water Slide | Deployment Capacity +2% | +10% |
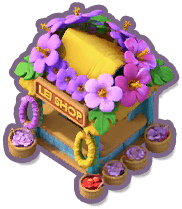 | Flower Garland Stall | Ammo Confiscation +6% | +30% |
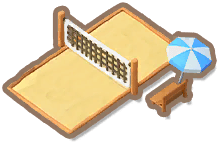 | Beach Volleyball Court | Resource Confiscation +2% | +10% |
Epic (Combat Buffs, Max Active 1)
Each Epic decoration starts at 500 Prosperity / Lvl 1 buff and maxes at 2,500 Prosperity / Lvl 5 buff. These are your major combat stat sources.
| Name | Lvl 1 Buff | Lvl 5 Buff (max) | |
|---|---|---|---|
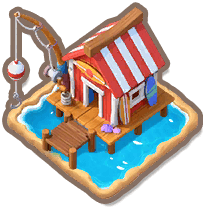 | Fishing Hut | Marksman Defense +0.5% | +2.5% |
 | Mariner's Discovery Center | Biker Defense +0.5% | +2.5% |
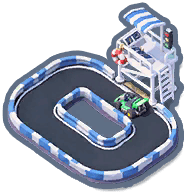 | Beach Karts | Marksman Attack +0.5% | +2.5% |
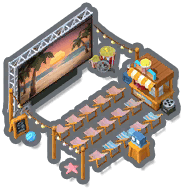 | Open-air Cinema | Construction Speed +1.2% | +6% |
 | Diving Club | Biker Attack +0.5% | +2.5% |
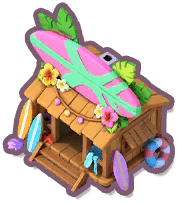 | Surfing Club | Guard Defense +0.5% | +2.5% |
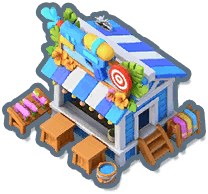 | Water Gun Shooting Range | Guard Attack +0.5% | +2.5% |
Scenic Decorations (Sapphire Bay Lighthouse, Max Lvl 10)
The Sapphire Bay Lighthouse is a Scenic Decoration — a separate category from the 31 functional decorations above. It maxes at Lvl 10, not Lvl 5, and it is unlocked by Sapphire Bay Lighthouse Blueprints. There is no drop — you buy or exchange the blueprint. At Lvl 1 it gives +1% Squad Health and +1% Squad Penetration; at Lvl 10 it gives +10% Squad Health and +10% Squad Penetration.
Blueprint Sources
| Source | Cost | Limits & Requirements |
|---|---|---|
| Sapphire Bay Store (“Sapphire Builders”) | 50,000 Coconut Cocktails per blueprint | Limit 1 per week — the store resets weekly. Requires Tiki Bar Lvl 10 (visible but locked at Tiki Bar Lvl 9). The store itself requires Chief's Office Lvl 19. |
| Exchange | 10 Universal Decoration Construction Blueprints = 1 Sapphire Bay Lighthouse Blueprint | One Universal Decoration Construction Blueprint is free in the same store; the rest comes from events. |
| Event Output | unconfirmed | Listed as a source in the game data, but it is server-side only — no drop table exists in the client, so the specific events are unconfirmed. |
Upgrade Costs
| Upgrade | Blueprints |
|---|---|
| Unlock (Lvl 1) | 1 (first blueprint) |
| Lvl 1→2 | 2 |
| Lvl 2→3 | 4 |
| Lvl 3→4 | 6 |
| Lvl 4→5 | 8 |
| Lvl 5→6 | 10 |
| Lvl 6→7 | 10 |
| Lvl 7→8 | 12 |
| Lvl 8→9 | 12 |
| Lvl 9→10 | 16 |
| Upgrade total | 80 |
| Total to max | 81 |
⏳ Time to Max the Lighthouse
At the store-only rate of 1 blueprint per week, maxing the Lighthouse takes 81 blueprints ≈ 81 weeks, or 4,050,000 Coconut Cocktails in total. Every Universal Decoration Construction Blueprint you exchange cuts that timeline.
08. Available Buffs (All 22)
The 22 buff types Sapphire Bay can grant, categorized. All buffs from Sapphire Bay are permanent account-wide stat boosts as long as the relevant decoration (or Tiki Bar level) is active.
Combat Buffs (Class-Specific)
| Buff | Source |
|---|---|
| Guard Attack +2.5% | Water Gun Shooting Range (Epic) |
| Guard Defense +2.5% | Surfing Club (Epic) |
| Biker Attack +2.5% | Diving Club (Epic) |
| Biker Defense +2.5% | Mariner's Discovery Center (Epic) |
| Marksman Attack +2.5% | Beach Karts (Epic) |
| Marksman Defense +2.5% | Fishing Hut (Epic) |
Squad-Wide Combat Buffs
| Buff | Source |
|---|---|
| Squad Attack +5% | Tiki Bar Lvl 6+ |
| Squad Defense +5% | Tiki Bar Lvl 4+ |
Speed / Production Buffs
| Buff | Source |
|---|---|
| Dispatch Speed +10% | Ice Cream Truck (Rare) |
| Research Speed +4% | Seaside Hot Spring (Rare) |
| Construction Speed +10% (stacked) | Large Bonfire (Rare) +4% AND Open-air Cinema (Epic) +6% |
| Healing Speed +130% (stacked) | Tiki Bar Lvl 7 +120% AND Coastal Crafts (Rare) +10% |
| Training Speed +5% | Fruit Stall (Rare) |
| Squad Deployment Speed +5% | Bird Watching Tower (Rare) |
| Deployment Capacity +20% (stacked) | Tiki Bar Lvl 2+ +10% AND Water Slide (Rare) +10% |
Confiscation Speed Buffs
| Buff | Source |
|---|---|
| Cash Confiscation +30% | Picnic Mat (Rare) |
| Gas Confiscation +30% | Beach DJ (Rare) |
| Ammo Confiscation +30% | Flower Garland Stall (Rare) |
| Electricity Confiscation +30% | Beach Trampoline (Rare) |
| Resource Confiscation +10% (general) | Beach Volleyball Court (Rare) |
💡 Maxed Sapphire Bay Buff Stack
Fully maxed Sapphire Bay (Tiki Bar Lvl 7 + all Rare/Epic decorations at Lvl 5) gives you: Healing +130%, Deployment Capacity +20%, Construction +10%, all 6 class atk/def stats +2.5%, Squad Atk/Def +5% each, all 4 resource confiscations +30%, +Resource Confiscation +10%, Dispatch +10%, Research +4%, Training +5%, and Squad Deployment Speed +5% — permanently active across your entire account.
09. Tasks & 7-Day Sign-In
The island has two reward systems beyond passive gameplay: Construction Tasks (objective chains tracking your progress) and a 7-Day Sign-In tied to the prologue period that gives mostly cocktails plus 3 decoration tokens.
 Tiki Bar Upgrade Task Chain
The headline task chain rewards you for upgrading the Tiki Bar. Each level pays out incremental cocktails + component items.
| Tiki Bar Level Reached | Task Reward |
|---|---|
| Lvl 1 | 500 cocktails + 1× 1hr universal speedup |
| Lvl 2 | 700 cocktails + 2× 1hr universal speedups |
| Lvl 3 | 1,000 cocktails + 3× 1hr universal speedups |
| Lvl 4 | 1,500 cocktails + 4× 1hr universal speedups |
| Lvl 5 | 2,000 cocktails + 5× 1hr universal speedups |
| Lvl 6 | 2,500 cocktails + 6× 1hr universal speedups |
| Lvl 7 (max) | 3,000 cocktails + 7× 1hr universal speedups |
Total task rewards just from the Tiki Bar chain: 11,200 cocktails + 28 1hr universal speedups. These offset the Tiki Bar upgrade costs significantly.
Other Construction Tasks
Additional task chains reward placing decorations, upgrading decorations, clearing trees, and reaching specific Prosperity totals. Highlights:
- ▸ Place / upgrade Rare or Epic decorations: 300-500 cocktails each tier
- ▸ Place N decorations (1, 3, 5, 10, 20): 200-1,000 cocktails per tier
- ▸ Upgrade decorations N times: 500-2,000 cocktails per tier
- ★ Reach 100 Prosperity: 10,000 cocktails (a major one-time bankroll boost)
- ▸ Upgrade a decoration to Lvl 5: 3,000 cocktails
 7-Day Sign-In
| Day | Rarity | Reward |
|---|---|---|
| Day 1 | Uncommon | 1× Uncommon decoration token (Freshly Cut Coconut Stall) |
| Day 2 | Common | 2,000 cocktails |
| Day 3 | Rare | 1× Large Bonfire (Rare, Construction Speed buff) |
| Day 4 | Common | 2,500 cocktails |
| Day 5 | Common | 3,000 cocktails |
| Day 6 | Common | 3,500 cocktails |
| Day 7 | Epic | 1× Beach Karts (Epic, Marksman Attack buff) |
Total sign-in: 11,000 cocktails + 3 decoration tokens (1 Uncommon, 1 Rare, 1 Epic). Don't miss day 7 — the Epic Beach Karts is one of your major combat decorations.
11. Prosperity Rankings
Sapphire Bay rankings (called “Island Prosperity” in-game) measure who has the highest historical peak Prosperity score. There are 4 ranking tabs covering different scope levels (as of the writing of this guide — game version 0.0.784).
Strategic Guidance — Members Only
Signup to unlock this content.
Ranking Tabs
| Tab | Scope | Refresh | |||||||||||||||||||||||||||||||||||||||||||||||||||||||||||||||||||||||||||||||||||||||||||||||||
|---|---|---|---|---|---|---|---|---|---|---|---|---|---|---|---|---|---|---|---|---|---|---|---|---|---|---|---|---|---|---|---|---|---|---|---|---|---|---|---|---|---|---|---|---|---|---|---|---|---|---|---|---|---|---|---|---|---|---|---|---|---|---|---|---|---|---|---|---|---|---|---|---|---|---|---|---|---|---|---|---|---|---|---|---|---|---|---|---|---|---|---|---|---|---|---|---|---|---|---|
| Current Alliance | Your alliance | Each time opened | |||||||||||||||||||||||||||||||||||||||||||||||||||||||||||||||||||||||||||||||||||||||||||||||||
| Current State | Your server/state | Each time opened + daily at 10:00 server | |||||||||||||||||||||||||||||||||||||||||||||||||||||||||||||||||||||||||||||||||||||||||||||||||
| Unimplemented Feature — Members Only | |||||||||||||||||||||||||||||||||||||||||||||||||||||||||||||||||||||||||||||||||||||||||||||||||||
| All States (Global) | Every state in the game | Daily at 10:00 server | |||||||||||||||||||||||||||||||||||||||||||||||||||||||||||||||||||||||||||||||||||||||||||||||||
Ranking Rules
1. Tiki Bar Lvl 3+ required. Only chiefs with a Tiki Bar at level 3 or higher will appear on the Prosperity rankings.
2. Historical peak Prosperity wins. Rankings are based on your highest-ever Prosperity score, not your current. Dismantling decorations doesn't drop you in the rankings.
3. Tiebreaker: time-of-arrival. If two chiefs have the same peak Prosperity, the one who reached that score FIRST ranks higher.
4. Like counts refresh with rankings. The “likes” tally you see on the leaderboard updates at the same time as the ranking refresh.
5. Alliance red-dot notification. A red dot on the Alliance rankings means there are alliance members whose Tiki Bars you can help — click it to find help opportunities quickly.
12. Strategy & Investment Priorities
Sapphire Bay is a long-haul side feature. The buffs are permanent and substantial, but acquisition takes weeks-to-months. Here's the priority order.
Phase 1: Rush Tiki Bar Lvl 3
Goal: Reach Tiki Bar Lvl 3 as fast as possible. This unlocks rankings entry AND the ally help loop.
- ★ Total cost: 6,500 cocktails + 1,200 Prosperity
- ★Cocktails: Collect from Tiki Bar production, place 1-2 Workshops near accessible trees, claim supply crates on the starter beachTactical Detail — Members Only
- ★ Prosperity: Place all Day-1-available Common decorations + the Day 1 sign-in Uncommon token. Roughly 5-8 placements gets you past 1,200 Prosperity
Phase 2: Start Helping Daily + Open the Map
Goal: Lock in the daily help loop (3 allies/day) AND expand tree clearing footprint.
- ▸ Help 3 alliance members every day — free cocktails, alliance goodwill
- ▸ Build a 2nd Workshop (unlocks at Lvl 5 Tiki Bar). Upgrade each to Lvl 4 (2 workers each) before pushing any single one higher
- ▸ Focus clearing routes on supply crate adjacency — every crate unlocked is more cocktails
- ▸ Continue placing Common/Uncommon decorations up to their Max Active caps
Phase 3: Collect & Upgrade Functional Decorations
Goal: Place one of each functional Rare/Epic decoration, then start upgrading the ones aligned with your account bottlenecks.
- ★ Combat-focused? Prioritize the 6 Epic class-stat decorations (Beach Karts, Diving Club, Surfing Club, Water Gun Shooting Range, Fishing Hut, Mariner's Discovery Center)
- ★ Resource/economy-focused? Prioritize the 4 Confiscation Rare decorations (Picnic Mat, Beach DJ, Flower Garland Stall, Beach Trampoline) — these give +30% each which is huge
- ★ Builder/researcher? Open-air Cinema (Construction +6%), Large Bonfire (+4% stacking), Seaside Hot Spring (Research +4%)
- ▸ Remember: each Rare/Epic has Max Active = 1, so collect them all over time. You're not picking between them — you're choosing upgrade order.
Phase 4: Full Clear + Processing Plant
Goal: Clear every tree on the island to unlock the Coconut Processing Plant.
- ✓ Once all trees are gone: Plant unlocks (steady 40 cocktails/hr/worker), Workshops can be dismantled, and you collect the one-time clearing reward
- ✓ All 60 supply crates accessible — collect the remaining cocktail bankroll
- ✓ Now optimize the layout: dismantle Workshops, place the Plant, fill empty grid space with cosmetic paths/plants if you want (still skip the diamond-cost ones unless it's your aesthetic preference)
Phase 5: Push Tiki Bar to Max + Decoration Maxing
Goal: The endgame grind — push Tiki Bar to Lvl 7 and max out the functional decorations.
- ★Tiki Bar Lvl 4-7 upgrades cost 60,000 cocktails total — slow grind
- ★Each Rare/Epic decoration to Lvl 5 requires 15 Lvl 1 copies of itself — most of these only come from packs, events, and sign-ins, so this stretches over months
- ★Save your Universal Decoration Construction Blueprints — they exchange into Sapphire Bay Lighthouse Blueprints, the highest-tier endgame chase (see the Decoration Catalog)
Strategic Caveat — Members Only
Signup to unlock this content.
TL;DR — The Quick Hits
- 1. Sapphire Bay is your personal 60×60 island that grants permanent account-wide attribute buffs through placed decorations.
- 2. Two resources: Coconut Cocktails (currency) and Prosperity (ranking score).
- 3. 3-day Prologue Voyage gates entry — real-time wait, claim story entries every 3 hours.
- 4. Tiki Bar Lvl 3 is THE FIRST milestone — unlocks rankings entry AND ally help loop. Cost: 6,500 cocktails + 1,200 Prosperity.
- 5. Workshops chop trees automatically. Workshop Lvl 4 doubles workers (1 → 2). Build multiple workshops to clear faster.
- 6. Each tree = exactly 52 cocktails (37,440 HP ÷ 720 wood/cocktail). Workshop level only changes how fast you extract it.
- 7. Online (on Island screen) = 100% efficiency. Offline = 50%. Keep the game open on the Island screen to DOUBLE wood production.
- 8. Full island clear unlocks the Processing Plant (40 cocktails/hr/worker, single-level building).
- 9. 60 supply crates on the map = ~184,500 cocktails total + 15 component items. Clear adjacent grids to open them.
- 10. Rare/Epic decorations have Max Active = 1 — collect all of them, don't duplicate.
- 11. Help 3 alliance members daily for free cocktails. Resets 00:00 server.
- 12. Like allies' islands weekly (free goodwill, 1× per ally per week).
- 13. Save Universal Decoration Construction Blueprints — they exchange into Sapphire Bay Lighthouse Blueprints.
- 14. Don't recycle Universal Decoration Construction Blueprints and don't overplace functional Rare/Epics — both are common wastes that delay endgame.
- 15.Strategic Caveat — Members Only
- 16.Strategic Caveat — Members Only
10. Social: Helping Allies & Visiting
Sapphire Bay has a robust social layer built around helping allies manage their Tiki Bars. Daily participation in this loop is a meaningful source of cocktails — and you should be helping your allies, full stop.
The Help Mechanic
Liking
You can like an ally's island once per week. Likes feed the ranking displays. There's no daily/hourly limit — it's just one shot per week per ally, but you can like multiple allies. Liking costs nothing.
Other Social Actions
★ The Help Loop is Free Cocktails
Helping 3 allies daily takes about 30 seconds total. The cocktails add up over a week — and you're also banking goodwill in the alliance. Do this every single day after you hit Tiki Bar Lvl 3.